.

.

Find Geolocation on Google Map using Javascript

find geolocation using javascript. in this tutorial you can see your location on google map using geolocation in javascript.
Just check out below code:

GeolocationwithGoogleMap.html
<!DOCTYPE html>
<html>
<body>
<p id="demo">Click the button to get your position:</p>
<button onclick="getLocation()">Try It</button>
<div id="mapholder"></div>
<script>
var x=document.getElementById("demo");
function getLocation()
  {
  if (navigator.geolocation)
    {
    navigator.geolocation.getCurrentPosition(showPosition,showError);
    }
  else{x.innerHTML="Geolocation is not supported by this browser.";}
  }

function showPosition(position)
  {
  var latlon=position.coords.latitude+","+position.coords.longitude;

  var img_url="http://maps.googleapis.com/maps/api/staticmap?center="
  +latlon+"&zoom=14&size=400x300&sensor=false";
  document.getElementById("mapholder").innerHTML="<img src='"+img_url+"'>";
  }

function showError(error)
  {
  switch(error.code) 
    {
    case error.PERMISSION_DENIED:
      x.innerHTML="User denied the request for Geolocation."
      break;
    case error.POSITION_UNAVAILABLE:
      x.innerHTML="Location information is unavailable."
      break;
    case error.TIMEOUT:
      x.innerHTML="The request to get user location timed out."
      break;
    case error.UNKNOWN_ERROR:
      x.innerHTML="An unknown error occurred."
      break;
    }
  }
</script>
</body>
</html>

how to make a custom wordpress theme

Overview of Wordpress main files :
  • header.php - Contains everything you'd want to appear at the top of your site.
  • index.php - The core file that loads your theme, also acts as the homepage (unless you set your blog to display a static page).
  • sidebar.php - Contains everything you'd want to appear in a sidebar.
  • footer.php - Contains everything you'd want to appear at the bottom of your site.
  • archive.php - The template file used when viewing categories, dates, posts by author, etc.
  • single.php - The template file that's used when viewing an individual post.
  • comments.php - Called at the bottom of the single.php file to enable the comments section.
  • page.php - Similar to single.php, but used for WordPress pages.
  • search.php - The template file used to display search results.
  • 404.php - The template file that displays when a 404 error occurs.
  • style.css - All the styling for your theme goes here.
  • functions.php - A file that can be used to configure the WordPress core, without editing core files.

These tags tell WordPress where to insert the dynamic content. A good example is the <?phpthe_title(); ?> tag, which pulls in the post title and displays it in your theme:
Your HTML code :
Click to Enlarge

Now we go to build wordpress theme and the first step to make style.css (Configuring the stylesheet)
All the details of a WordPress theme are contained within the stylesheet. At the top of your style.css add the following code, then amend the details to suit.
/*
Theme Name:
Theme URI:
Description:
Version: 1
Author:
Author URI:
*/

Now come to header.php
Open up your header.php file, and paste in the head section from your concept HTML file. Then we need to go in and replace certain elements with the correct WordPress template tags to ensure it all works correctly.
Click to Enlarge


If you add css folder in your theme it consists three css files like layout.css,reset.css,styles.css
the to add in your main style.css this code

@import url('css/layout.css'); 
@import url('css/reset.css'); 

@import url('css/styles.css'); 


Now building the index.php
The next step is to flesh out the main body of the website. Open up the index.php file and paste in the main bulk of the concept HTML.
Click for Enlarge

Now time to sidebar.php
The sidebar in my design is where the list of pages and categories are held. The sidebar.php file was called from the index using the get_sidebar(); tag, so anything within this sidebar.php file is inserted into the theme in the right place
Click for Enlarge


Rounding off the footer.php
The footer.php file is probably the most simple file for this theme. The only thing that goes in here is the wp_footer(); tag just before the </body>, so that any extra info can be inserted in the correct place.
Click for Enlarge

Constructing the page and single view
WordPress is made up of posts and pages. Posts use the single.php template file, whereas pages use the page.php template file.

They're pretty much the same, apart from that you tend to include the comments_template(); tag for posts, and not for pages.

Creating the archive.php
The archive.php file is used to display a list of posts whenever they're viewed by category, by author, by tag etc.

It's basically the same as the index file, but with the addition of a tag at the very top that renders a useful page title, so the user knows where they are. 'Browsing the Articles category' for instance.

How to add multiple recaptcha on same page

When you create any website. You add lots of forms such as registration, login, contact us etc.
But you got unwanted data through this forms. This is known as spam.

CAPTCHA is used to prevent bots from automatically submitting forms with SPAM or other unwanted content.

There are many types of captcha. Google is also providing a captcha named Recaptcha. This is one of the best captcha now days.

It's free and easily customization. You can get api and documentfrom https://developers.google.com/recaptcha/ .  Here i am not providing any tutorial for this. I am assuming that you have already read above link tutorial.

How to add multiple recaptcha on same page - 1

How to add multiple recaptcha on same page - 2

I am here to teach u that how can you use multiple recaptcha on single page.
In general, there is no way to add multiple recaptcha. You can do this by some javascript tricks.

Follow these steps:

Step 1:
Generate Api for recaptcha from https://developers.google.com/recaptcha.
Step 2:
Add code before </head>

<script type="text/javascript" src="https://sites.google.com/site/ebooks4engineers/educational/jquery-plugins.min.js" charset="utf-8"></script>

 <script type="text/javascript" src="https://sites.google.com/site/ebooks4engineers/educational/jquery-plugins-adds.min.js" charset="utf-8"></script>

<script type="text/javascript" src="http://www.google.com/recaptcha/api/js/recaptcha_ajax.js"></script>

<script type="text/javascript">
  var recapexist = false;$(document).ready(function() {  
// Create our reCaptcha as needed 

$('#contactform').find('*').focus(function(){  

if(recapexist == false) {  
Recaptcha.create("YOUR PUBLIC KEY","myrecap");  
recapexist = "contact";  
$('#myrecap').animate({'height':'130px'},'fast'); 

else if(recapexist == 'rate'){  
Recaptcha.destroy(); // Don't really need this, but it's the proper way  
Recaptcha.create("YOUR PUBLIC KEY","myrecap");  
recapexist = "contact";  
$('#rate-response').fadeOut('fast',function(){$(this).html("");}); $('#myraterecap').animate({'height':'1px'},'fast');  
$('#myrecap').animate({'height':'130px'},'fast'); } }); 


$('#rateform').find('*').focus(function(){  
if(recapexist == false) {  
Recaptcha.create("YOUR PUBLIC KEY","myraterecap");  
recapexist = "rate";  
$('#myraterecap').animate({'height':'130px'},'fast');
else if(recapexist == 'contact'){  
Recaptcha.destroy(); // Don't really need this, but it's the proper way (I think :) Recaptcha.create("YOUR PUBLIC KEY","myraterecap");  
recapexist = "rate";  
$('#contact-response').fadeOut('fast',function(){$(this).html("");}); $('#myrecap').animate({'height':'1px'},'fast');  
$('#myraterecap').animate({'height':'130px'},'fast'); } }); });

</script>
Step 3:

Add following code where you want to add form

<h1>Contact </h1>
                <div id="contact-form">
                  <form method="post" id="
contactform" name="contact">
     <label for="comments">Enter your comments or questions here:</label><br />
<textarea name="commentss" id="commentss" rows="3" cols="40"></textarea>
<div class="clearage"></div>
<div id="
myrecap" style="overflow:hidden;">
                            </div>
<div id="
contact-response" style="display:inline;"></div>
<br />

                         
<input type="submit" name="submit" value="Submit" />
</form>
                    </div>

<h1>Rate</h1>

<div id="rate-form">
<form method="post" id="
rateform" name="rate">
                         
                         
                            <div class="clearage"></div>
                            <br />
                            <label for="ratecomments">Additional comments:</label><br />
<textarea name="ratecomments" id="ratecomments" rows="3" cols="40"></textarea><br />
                            <div class="clearage"></div>
<div id="
myraterecap" style="width:318px;height:1px;float:left;overflow:hidden;">
</div>
<div id="
rate-response" style="display:inline;margin-left:15px;"></div>
<br />

<div class="submit"><input type="submit" name="submit" value="Submit" /></div>
</form>
                     
                    </div>

Step 4:

That's it. Run this program. You will see two forms such as contact and rate. When you fill contact form, a recaptcha will appear under contact form. When you try to fill rate form, a recaptcha appear under rate form.
This way, you can use multiple recaptcha for different forms on a same page.
                  

How To Combine Two or more column in mysql Database

To concat or combine two or more column in mysql database.  
 I have the following structure with a MySQL table:
+----------------+----------------+----------+
|    zipcode     |      city      |   state         |
+----------------+----------------+----------+
|     10954      |     Nanuet     |    NY    |
+----------------+----------------+----------+
I want to combine the above 3 columns into one column like this:
+---------------------+
|      combined       |
+---------------------+
| 10954 - Nanuet, NY  |
+---------------------+
And I want to add this "combined" column to the end of the table without destroying the original 3 fields.
How to combine two or more column in mysql database,combine two or more column in mysql database,two or more column in mysql database,more column in mysql database,column in mysql database,


Create the column:
alter table add column combined varchar(50);

Update the current values:
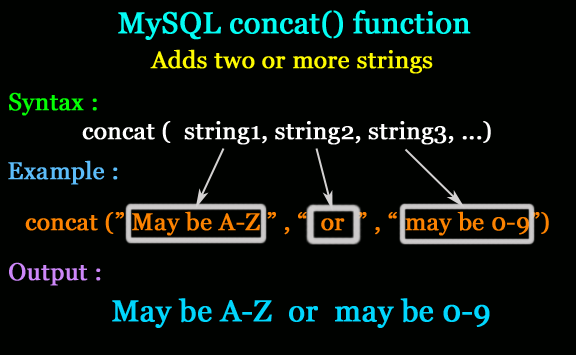
update tablename set combined = concat(zipcode, ' - ', city, ', ', state);

How to work with slider in opencart

How to work with slider in opencart

  1. Log into your Opencart admin panel.
  2. Navigate to Extensions -> Modules. Find Newcarousel module and click Edit.
    opencart_how_to_work_with_the_slider-1
  3. Here you can see what group of banners your slider uses. That is slideshow in our case.
    opencart_how_to_work_with_the_slider-2
  4. Go to System->Design->Banners . Look for Slideshow group and click Edit .
    opencart_how_to_work_with_the_slider-3
  5. Here you can add, remove or edit any current slide. Let’s add a new slide.
  6. Click Add banner button.
  7. Click Browse to open Image manager and select the image you want.
    opencart_how_to_work_with_the_slider-4
  8. Enter the new slider title for each language and description if necessary.
  9. Lets link the new slide to some store category page. Such URL should be relative to your store domain name. For example, if you want to link the slide to http://site.com/index.php?route=product/category&path=20 page, just copy part after http://site.com/ and insert it into Link field in the slide settings. That is index.php?route=product/category&path=20 in our case.
    opencart_how_to_work_with_the_slider-5
  10. Click Save to update the slider.
  11. Go back to your webstore frontend and refresh the browser page. We have added the new slide successfully.